
 Free Screen Recorder for Chrome


Welcome to StoryXpress!
Congratulations on signing up for StoryXpress and taking the zeroth step towards taking your sales pitches to the next level using videos.
When you first start making videos, you can be intimidated. It’s normal but, hey! you can’t let this be an obstacle. And, you don’t have to worry at all, because we’re there for you at every step.
Just to make it easier for you, we have a chat option on your StoryXpress dashboard and our customer support team is available 24*7 to walk you through any product feature or solve any specific queries that you may have.

There is so much that goes into making a video and it’s more important to just get started and create a video than to make the perfect video. And, that’s exactly what we’re about to do.
This guide will help you record your first video with StoryXpress. We shall have a look at the step-by-step process of creating a video with StoryXpress without worrying about how the end product will look like.
Let’s dive right into it!
Before You Record
Before you hit ‘Record’, you must be sure about the subject. And, how do you go about selecting the subject? Well, it depends on if you have some experience with creating videos or not.
Have You Recorded Videos Before?

If you’ve some prior experience with recording videos and you feel confident about the process, you may brainstorm and carefully select a subject out of the overwhelming number of options available.
Revisit your sales strategy [assuming you already have one] and see which prospects would appreciate a video. It may be a follow-up video or demo video or anything that you feel like recording today.
In case, you don’t have a sales strategy ready, here is a guide on how to create a sales strategy and infuse videos into it. And, here are the different kinds of sales videos that you can create today.
If You’ve Never Recorded a Video Before
If you’ve never recorded a video in your life and selecting a subject feels too difficult, you may skip the heavy lifting and simply get started with recording a video explaining the product that you sell.
Talk about the problem it solves, its features, and what it solves for your prospects.
However, remember, no matter what subject you choose, your video must not be very long and there is a limit to what you should talk about in a single video.
If there is a lot on your mind, you can always make a series of videos, but that’s a guide for another day.
Creating a Script

Once you have finalized the subject, it’s time to jot down what you’d say and define a scope for your video.
As you create the first draft of the script, you don’t have to worry about if it is good enough. Just get all of your ideas down on paper, whatever comes to your mind.
For instance, if you’re creating an explainer video for your product, you must write down [as a bulleted list]:
- What problem the product helps solve
- Introduction to the product
- How exactly the product solves that problem
We’ll worry about turning these bullet points into an impressive script later. Here is a guide you may use: How to create a script for your video.
Bonus Read: How to Write a Video Script
Setting Up the Laptop

Once you have your initial script ready, the next step is to create a recording-friendly atmosphere.
How do you do that? Here is a quick checklist:
- Place the source of light in front of you, not behind you.
- Clean your camera lens.
- See to it if there are any distractions in your background.
- If you are screen recording, keep all the relevant tabs opened already and close the tabs that are not required.
- Hide your bookmarks bar, opened inboxes, or any confidential information.
- Turn off all the notifications that might distract the viewer.
- Ensure that your laptop has enough battery to complete the recording.
Recording the Video
Once you are ready, click on the StoryXpress icon in your Chrome Extension Tray.
If you haven’t pinned it already, here is how to find it:
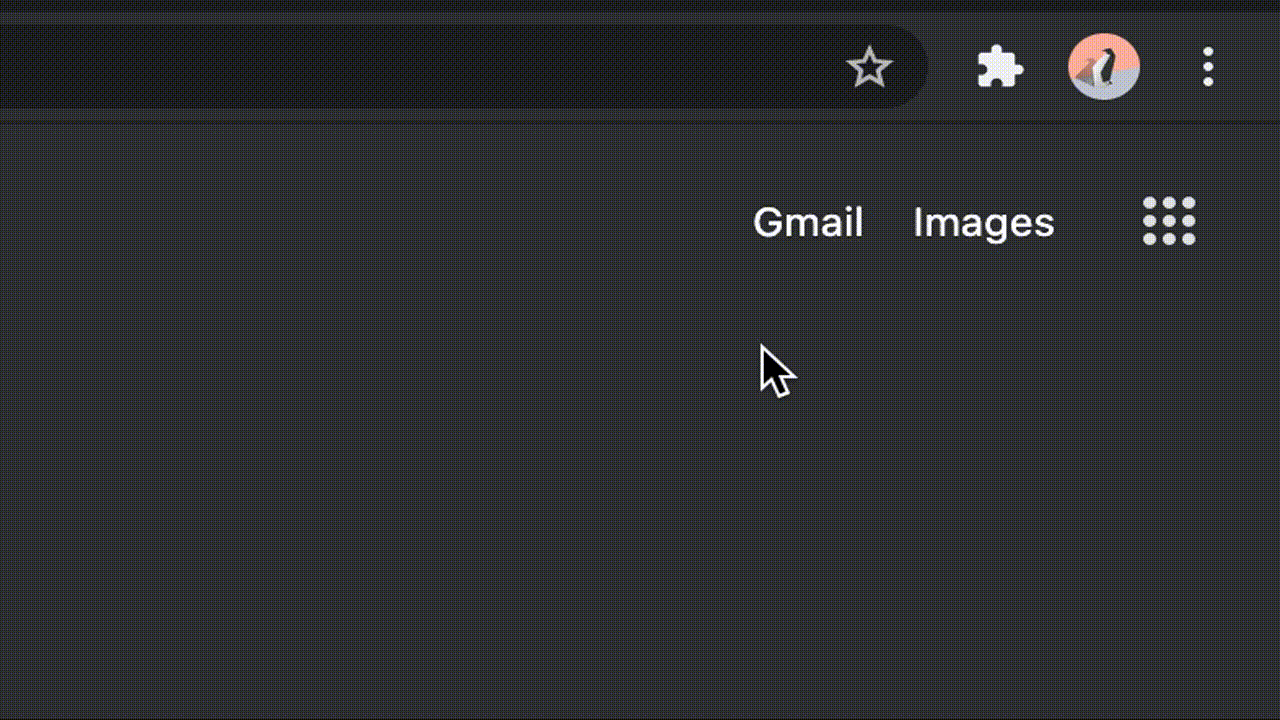
Once pinned, you should be able to see this icon in the top-right corner of your browser.

Click on the icon to see the various options available for recording:
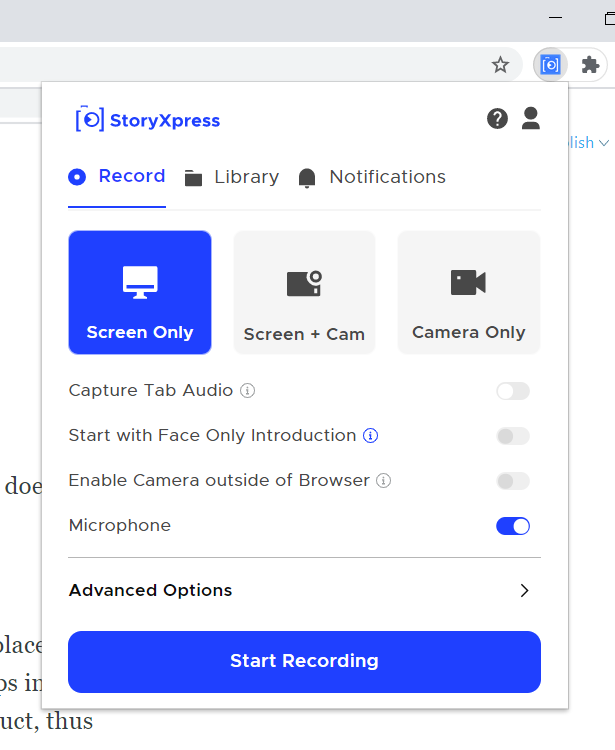
The “Camera Only” mode allows you to record yourself. Your screen doesn’t get recorded while you use this mode.
Use “Screen+Cam'' mode if you want to show your face in a bubble placed at a corner of the screen. This is our most frequently used option because it helps in striking an immediate connection with your prospects while showing your product, thus simulating a live sales demo presentation.
You can also use the “Camera Only” mode to record the introduction so that the video starts with you talking and making a connection with the viewer before continuing with the relatively difficult-to-grasp parts of it.
The “Screen Only” mode helps when you want to record your screen but not your face. If you are a bit camera shy or a beginner, this mode can be the ideal mode for you.
Once you are sure which mode to use, hit “Record” and the video will start recording.
After You Record
Once you are done recording and you hit “Stop”, your video will get uploaded to StoryXpress and you’d land on this page.
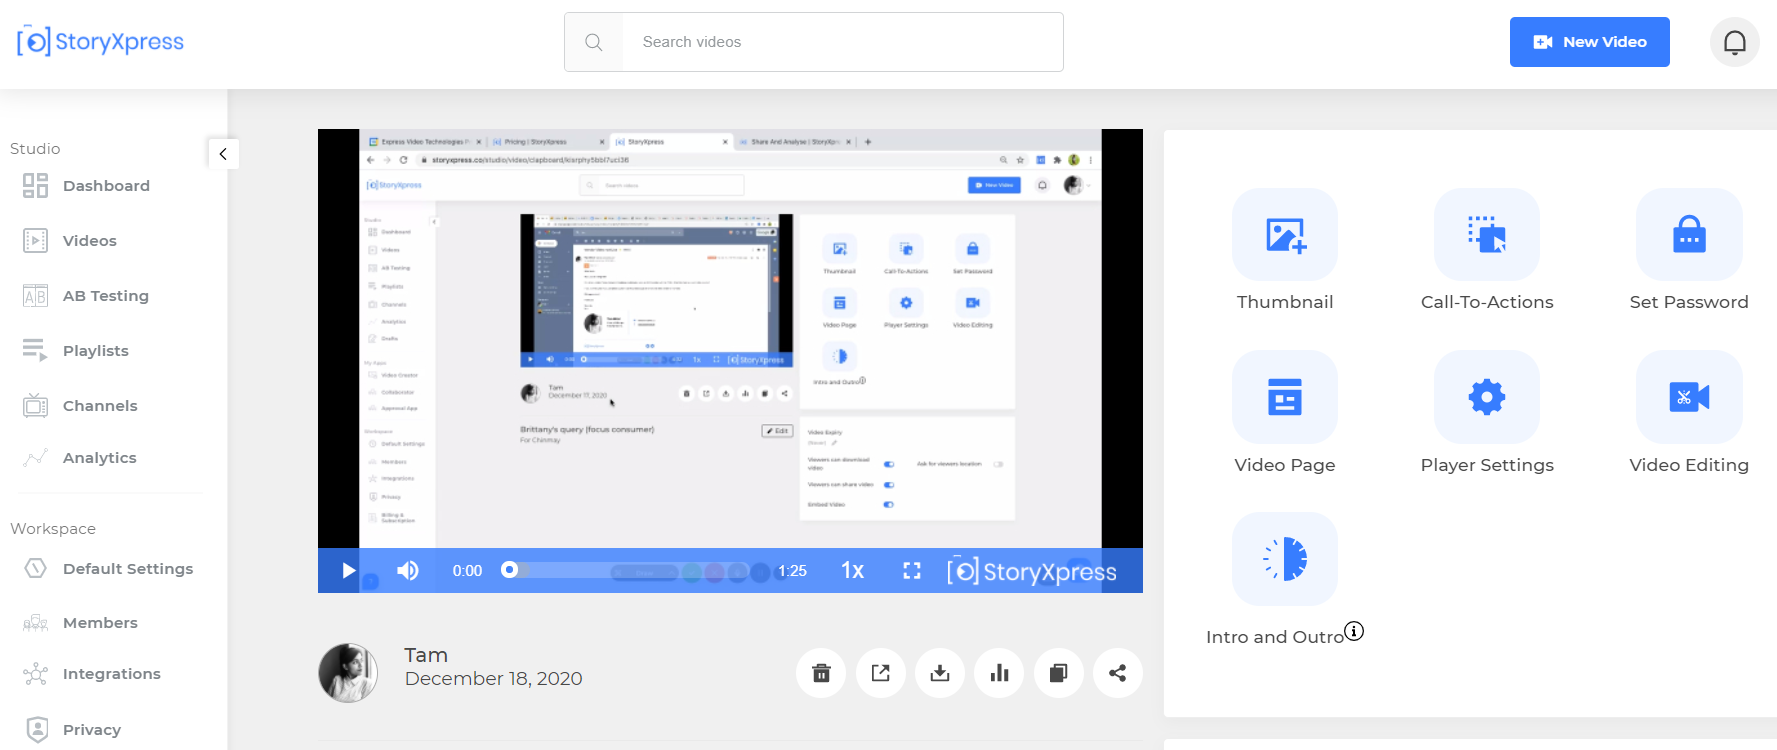
Here, you’d see multiple options to play with your recording.
For instance, you may:
- Create or upload a compelling thumbnail for your video
- Add call-to-actions such as buttons, forms, and banners
- Set a password for your video
- Add your brand elements to the video page such as uploading your logo and favicon
- Change the player settings, choose the player color and change the player controls
- Edit your video - trim, crop, and blur certain sections
- Add an interesting intro/outro clip to it
- Set an expiry date for your video
- Adjust the settings so that your prospects can download the video on their machine
- Ask for your prospect’s location
- Get SEO-friendly, lightweight embed code for your video and share it on social media handles
- Look at the video analytics dashboard to see what all is in there
All of your recorded and uploaded videos will appear in the “Videos” tab of your StoryXpress dashboard.
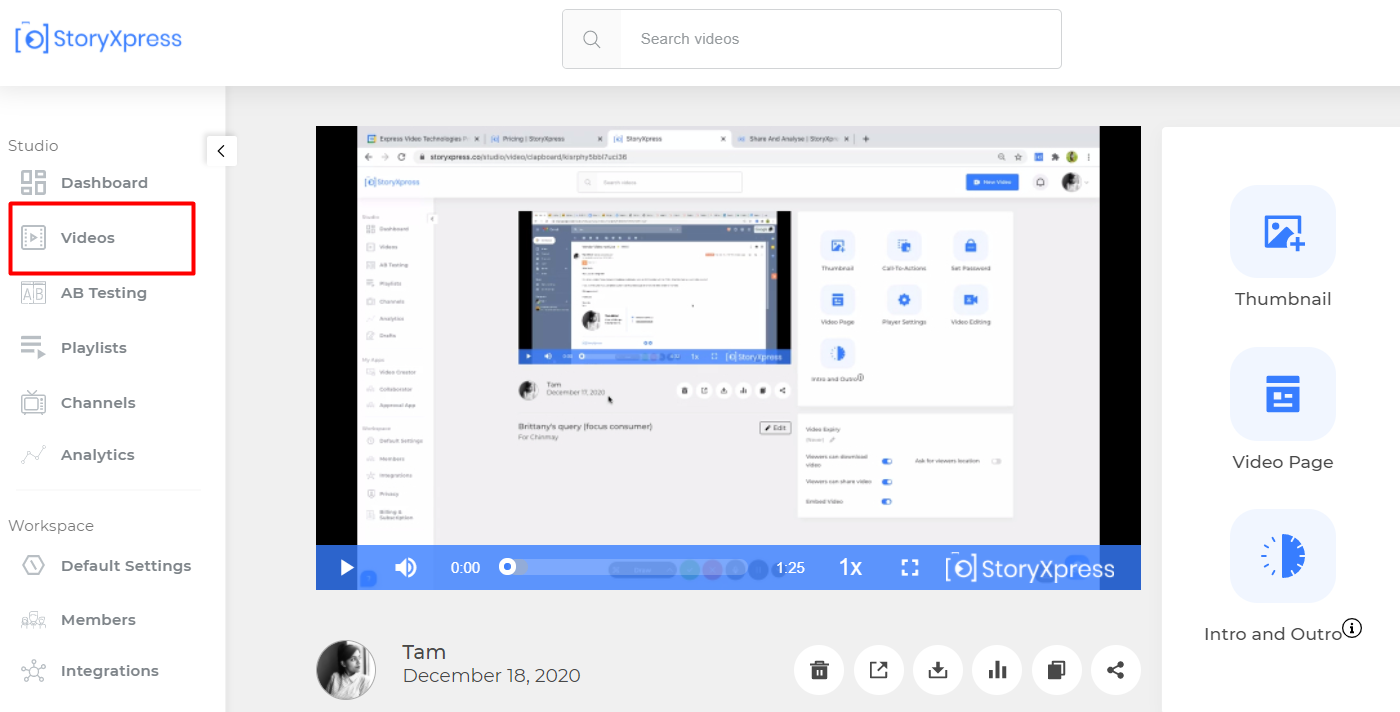
You can select any video and perform a variety of operations on it.
We just saw that there is a lot you can do once you are done recording your video. However, an ideal workflow can be:
- Record a video
- Edit it to make it publish-ready
- Embed it in your email to the prospect
- Track analytics
- Decode the analytics to understand what could have been better
- Repeat
You Just Created Your First Video With StoryXpress!

Ta-da!
That’s it. You just created your first video with StoryXpress!
Wasn’t that easy?
Wondering if your video is good enough? Well, honestly, there is always some scope of improvement in a video, and the best way to improve is to actively seek feedback.
Share the video you just created with your colleagues, friends, and family. If you’d like some professional feedback, feel free to mail your video to support@storyxpress.co. We will let you know how it looks and what can be made better and if we’re impressed we’ll feature it on our social media handles! Cheers!


